Monday, August 6, 2012

Mermaid BBQ Sauce is now available through FireCraft.com!


Since shipping has been getting more and more expensive every year, Mermaid BBQ Original Formula Sauce is now available through FireCraft.com (with new label art!) for the introductory price of $6.95 per bottle. The real advantage to our customers is the decreased shipping cost through UPS...   not only does FireCraft sell almost anything you'd need for grilling, smoking or outdoor cooking, but they also have some of the best shipping prices around. They have everything from whole smoker setups and Weber grills and accessories, to charcoal, smoking woods and even utensils. Orders over $99 ship free!

So make sure you check out the whole site while you're there. They have one of the best selections around, including many of the items we've already reviewed here. 

More recipes will be up soon, I hope everyone has already taken the time to grill at least a few weekends so far this year, I know we have!


Monday, March 29, 2010

Tools of the Trade: Smokenator 1000

The 22.5" Weber kettle is a very versatile piece of charcoal grilling equipment. When outfitted with the hinged grate, a water pan and either the charcoal rails or baskets, it can easily be pressed into duty as a smoker. Unfortunately, even with this additional equipment the space is somewhat limited. A few racks of babyback ribs barely fit, and adding anything beyond that is difficult without placing your food over the direct heat. Adding additional fuel is a delicate science, over the course of a 6 hour smoke you need to add additional coals a few times to keep the temperature up, but adding too much can cause a temperature spike that can have catastrophic results.

Enter the Smokenator 1000- a revolutionary device that converts the Weber kettle into a virtual offset fire box smoker. Not only does it keep the temperatures under control, but it opens up an entirely new area for additional food while smoking. By putting all the fuel along a 6.2" section of the side of the kettle, the rest of the charcoal grate can be used to cook some seriously large items- a whole turkey can fit in there, or even a few more racks of ribs. With the optional hovergrill, you can even exceed the cooking area of a Weber Smokey Mountain.

By stacking unlit briquets in the fuel chamber, then adding lit coals on top, the Smokenator allows you to perform a smaller version of the Minion Method, by keeping the lower vents mostly closed you can control how quickly the coals light, allowing a cooking time of up to 6 hours at 225 degrees without adding additional fuel.

Several configurations are available for purchase. The basic kit includes the Smokenator unit, steam pan, skewer (for stirring coals within the fuel chamber) and instructions for $55.95 before shipping. For $12 more you can add the Hovergrill, which places an additional layer of food 2" above the normal cooking surface. Additionally, a Taylor 5911n thermometer to monitor the chamber temperature is available as a $9 add-on to either kit.

The instruction manual (which I have managed to misplace) is very well written, and includes instructions on how to set up the initial load of fuel as well as making sure the vents are adjusted correctly. One unexpected addition was the creator's cellphone number for tech support. You don't see many people willing to give that kind of personal support to their customers these days.

How well does it work? Would you believe exactly as advertised? I opted for the complete kit including the Hovergrill and Taylor thermometer. For the first use I followed the instructions for the initial load of 60 briquets, carefully stacking the unlit coals inside the chamber and adding the specified amount of lit ones on top. Within a few minutes the coals were ready and the ribs (3 racks of babybacks) were added as well as some applewood chunks and chips. The temperature stabilized at 225 degrees within about 15 minutes and stayed reasonably steady through the entire cooking process with only minor agitation using the supplied skewer. Water was added to the unit twice throughout the cooking process. The water not only dampened temperature spikes, but kept much needed moisture in the chamber during smoking. Next time I use it I'll try a lot more food, I never expected it to be quite as easy as it was to maintain the temperature.

For the money, I don't know if there is a better addition to the Weber 22.5" kettles for smoking, and for 2010 there is a new version for the lucky few with the 26.5" One Touch Kettle.

Give the Smokenator a try, you'll be pleased with the results. I can't wait to use mine again.

Sunday, January 10, 2010

Tools of the Trade: Maverick ET-73 Smoker Thermometer

When you're using a smoker, one of the most difficult things to do is keep track of temperature. Not only do you have to worry about the chamber temperature, but you also have to worry about the internal temperature of whatever you're cooking. Lifting the lid to check on that is only going to make the cook time longer, as well as letting out all the smoke... not to mention the fact that you have to go outside to do it.

All these things seem like petty things to worry about when you're making delicious food, but when you're cooking something for 8 hours or more, you'd be happy to have something that would make your life a little easier.

To this day, I haven't found a better solution than the Maverick Smoker Thermometer. Not only does it monitor both temperatures, but it does it from inside your house with its remote receiver. I love to constantly monitor those long smokes, and this gives me the ability to do it without having to constantly hover over the smoker, which is a great thing indeed.

The waterproof remote transmitter has two probes, one that mounts to the cooking grate (with a supplied bracket) to monitor chamber temperature, and another food probe that is inserted into the meat. Last year I smoked a brisket for about 12 hours in a rainstorm with 20mph winds. This was for a competition or I would have avoided cooking on this day entirely. Although it sounds annoying, I was inside for the vast majority of the time and only had to go out to make some minor adjustments and add fuel very occasionally. It really made the experience a lot more tolerable. Even going outside every half hour to check my temps would have been a huge ordeal.

I'm not sure what the maximum range is, but it had no trouble making it the 60 feet into my apartment with fresh AAA batteries (supplied!), and the fact that the transmitter even has a cycling display was a big bonus. That way the receiver can live inside the kitchen, and when I walk by the smoker on the way to do something else I can check up on the progress without having to be near the other unit.

A small transmitter icon on the receiver lets you know if you're out of range, and the temperature of the meat probe seems reasonably accurate (within 3 degrees of my instant read). Setup is a breeze, just turn the transmitter on first and then the receiver to synchronize them. The entire system retails for under $40 from most places, and is available at Fred's Music and BBQ Supply locally, as well as Amazon and other online retailers. Remember, if you're lookin', you aint cookin'.

Saturday, August 29, 2009

Recipe: Seasoned Grill Fries with Dip


This incredibly simple yet versatile recipe requires a little bit of inside preparation before cooking, but is well worth it in the end.

Required:

3-6 large russet potatoes of roughly similar size
olive oil, preferably in a pump sprayer bottle
salt and pepper, any additional seasonings you like
2 cups of sour cream
1 cup BBQ sauce (you can guess which kind I prefer)

Take the potatoes and clean them under running water with a stiff bristled brush to get all the stuff off the skin. These used to live in the ground, remember?

Put them all in a large stock pot and fill with cold tap water to about 1" above the line of the potatoes. Put on stove over high heat until boiling; pot can be covered to speed up the process, but remember to remove the lid once the boiling starts unless you really enjoy cleaning your stovetop.

Allow potatoes to boil in the water for around 15 minutes and then remove from heat and drain. Let them cool for around 10 minutes to make them easier to cut without smashing. Boiling them first allows the outer parts of the potato to partially cook through, leaving the remaining inner sections (the ones that will be thinner once you cut them into wedges) to be cooked on the grill. If you boil them the right amount you'll see a line when the potato is cut in half where the very center section is still completely uncooked.

Once cool, cut potatoes into wedges using a sharp knife; I usually get 12 wedges per potato by quartering the potato first then cutting three wedges out of each quarter. For really large potatoes you might want to cut each quarter into 4. I'll leave it up to you, but don't call me in the middle for help.

Arrange the wedges skin side down on some type of large platter or cooking sheet and spray or brush lightly with olive oil.

Season the potatoes with spices you like and that go well with the food you're cooking. I always start with salt and pepper, but use things like ancho chili powder and dried cilantro flakes to give them extra flavor. You could always used a prepared spice blend as well, such as lemon pepper, cajun seasoning or even Old Bay. Make sure you get a good coating of stuff on them, as some of it is going to fall off while you're grilling. If you're putting them on the grill an you notice a side that looks a little light on the seasoning, you can always rub the potato in the residual oil and spices left on the platter that didn't land on potatoes the first time around.

Make sure your grilling surface is cleaned off; oil or non stick spray is usually not necessary. These are best cooked over indirect heat with the lid on, but can be flipped over the coals to really crisp them up if you like. When they're cooking at the right temperature they'll make a whistling noise as they cook. You'll know they're done when the outer part of the potato is a medium brown and starts to bubble up a little.


Mix the two cups of sour cream with about a cup of BBQ sauce for a delicious dip. Make sure you keep this in sight however, or you'll spot people putting it on their burgers before the fries are even done.


Feel free to experiment with different seasoning and dip combinations; I've probably made these a few dozen times and they've always been delicious. Ranch dressing with a bit of hot sauce is always a great combination as well.

Give them a shot, I'm sure you'll make them again and again.

Recipe: Grilled Thai Chili Glazed Chicken

I was sitting for about ten minutes in the produce section of the supermarket trying to figure out what I wanted for dinner, but wanted to use up some of the stuff I had in the house before buying a ton of fresh ingredients. I ended up walking out with three limes, a fresh ginger root and a clove of garlic for the modest price of $2.49 American. Ginger and garlic are included in a lot of the asian cooking I do, so I knew I was off to a good start.

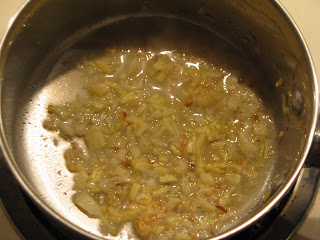
I started by dicing up some of the garlic and ginger and toasting them in a little oil. I usually season the oil this way when I cook with a wok, but haven't really tried it as the beginning of a glaze before. Once my kitchen smelled like a Chinese restaurant, I added the juice of two limes and the zest of one. Then 2 cups of honey and 2 Tbsp of Sriracha chili sauce got dumped into the pot. I continued to simmer this mixture for a few minutes to allow it to reduce slightly, then removed it from the heat to allow it to cool off before I had to cook with it. Once cooled, the glaze will be much thicker and stick to the chicken on the grill more easily than at a warmer temperature.


I seasoned three boneless, skinless chicken thighs with salt and dried cilantro flakes and went outside to get the grill set up. I used about 3/4 of a chimney starter all on one side of the grill so I could do higher heat indirect grilling; once the chicken started to firm up, I brushed the glaze on every few minutes, flipping them over every other time. The glaze stuck well, and many of the garlic and ginger pieces were stuck to the outside of the chicken for a good long time allowing it to soak up the flavor as it cooked.

As you can see in the picture, the glaze stuck to the grill grates as well; the excess that dripped down into the bottom of the grill actually solidified and stuck my lower vent to the inside of the bowl. Once a fresh batch of coals were dropped in the next day it freed up again as the honey warmed up.

Before going outside I set up my steamer to cook some sushi rice to go with the chicken, but ran out of time for a vegetable. Oh well, something to remember for next time.


After plating the chicken I put little drips of Sriracha all over, and piled the rice up to the side. The honey, lime and chili flavors work well together, I can't wait to make this again. Never be afraid of fresh ginger, no matter how ugly it looks.

Sometimes the best recipes are the ones you make up as you go along...

Tools of the Trade: Eastman Outdoors ZaGrill Pizza Cooker


Look, everyone loves pizza. I've been making them at home for a quite a few years now on a pizza stone in the oven, but have fallen in love with making them on the grill a little more recently. Pizzas can be cooked directly on the grill grates, but the higher temperature can lead to burned spots in places or dough that is not cooked all the way through depending on the type of dough you use.

We recently got a ZaGrill Pizza Cooker from Eastman Outdoors; this ingenious little product has a double heat shield in the base to keep temperatures more consistent on the bottom of the crust. The nonstick cooking pan is removable, which makes taking the pizza on or off the grill a snap. It won a Vesta award in 2005 for its design as well.

First we get the coals ready to maintain a temperature around 450 degrees, spread out evenly over the charcoal grate. Once we're in the correct range, the ZaGrill base is put on the grates to get up to temperature.

My girlfriend Sarah is an artist at rolling out pizza dough in a round shape of uniform thickness, so while I was outside playing caveman she was inside getting the dough ready. We used Trader Joe's refrigerated pizza dough for this pizza, rather than making our own; this dough is very consistent and we've used it quite a few times in the past, so we knew what to expect. At less than a buck for a bag of dough, the price and quality are hard to beat. They also make a garlic/herb version as well as whole wheat if you'd like something a little different. Flour was spread across the butcher block to keep the dough from sticking and rolled out into a 12" circle to fit on the cooking pan.

It is important to poke several air holes in the center section of the dough to keep it from puffing up and making a dough-dome when it starts to bake. We also brush a light coating of olive oil on the outer rim of the crust with basting brush. Then we liberally sprinkle on basil flakes and ground italian seasoning, as well as a layer of fresh romano cheese. I'm not a huge fan of most pizza crusts, but I've never left a scrap of one after we've made it this way.


Place the pizza on the cooking pan and onto the ZaGrill base in the grill with your temp around 450 degrees. Put the lid on and cook until the outer crust begins to brown slightly, but not to the point of the center section looking cooked; this usually takes about 5-7 minutes. Remove the entire pan from the grill and place on a clean heat safe surface, keeping in mind that the crust is exposed below the pan slightly through the air holes.

Now that you don't have to worry about the crust moving around on you, add your toppings. We used Trader Joe's pizza sauce for this as well, since we were already there buying dough; its a little on the bland side, so we added more seasonings to it after spreading it on the crust with a smooth bottomed 1 cup measuring cup.


Next we added the cheese and toppings; we went with grated low moisture mozzarella, provolone, parmesan and asiago with sliced pepperoni and green peppers. We like to layer the cheese in with the toppings, so it all sticks together and the flavors mix together while the pizza cooks. The instructions included with the pizza cooker tell you to cook it at 475 degrees for 25 minutes, but the initial test I did like that ended up with scorched cheese and an over crisped crust, so we went with less time and temperature this time around.

After about 15 minutes at 450 degrees, we started checking the pizza every two minutes or so. The smell was phenomenal, and the hardwood charcoal we used added a little bit of aroma and flavor you wouldn't get from cooking with an indoor oven.

The pizza came off the grill at right around the 20 minute mark and was given a few minutes of rest on a pizza stone (didn't want to use a wheel cutter on the nonstick surface) before cutting into it. Its life was very short after it was sectioned into slices. The crust was just about perfect, slightly crispy without being burned; a lot more evenly browned than I expected it to be. The flavors of the toppings got along with each other very well as would be expected, and the 5 different cheeses added an interesting depth of flavor. The crust was amazing with the added herbs and sharp taste of the romano; if you haven't tried this on homemade pizza you might want to give it a shot. Even the Philly pizza fanatics over at Pizza is Delicious would approve.

The ZaGrill Pizza Cooker is useful for cooking refrigerated and frozen pre-made pizzas as well as rolled dough of any type. The included instructions are most likely for the frozen variety due to the higher heat and longer duration it would take to bring these up to temperature, although it isn't noted. It is also important to mention that at the low cost of $19.95 shipped on Amazon.com, you could easily use a couple simultaneously if you had a large enough grill to accommodate them.

The removable pan is also useful for grilling vegetables or smaller items that would normally fall through the grates, but don't tell Nick you used it for that.

Eastman Outdoors also specializes in tons of outdoor grilling and frying equipment, you might want to check out their entire product range; its all top quality stuff.

Look for more grilled pizza recipes here in the future, we're going to keep this going.

Wednesday, August 26, 2009

Tonight's Dinner

It's hot so let's keep it simple.

Yellow, orange and red heirlooms dressed with some simple olive oil and vinegar and a few sprinkles of Locatelli Romano.


Boneless pork loin chops. Pork chops are one of my favorites and when they're on sale, I stock up. Salt and cracked pepper are all you need.


On the plate.


That's it. Simple and ready in no time.

Tuesday, August 18, 2009

Tools of the Trade: Maverick OT-03BBQ Digital Grill Thermometer

Let me start by saying that for the money, this is a VERY impressive thermometer. I'm not going to go all infomercial on you by describing all of its features and benefits and then asking you "how much would you pay?" or anything, so I'll come right out and say it. $24.99 is all this thing costs. Maverick did an amazing job with the design of this unit, and I'd gladly pay $40 for one now that I've used it.

I've used digital thermometers in the past to measure the internal temperature of something I was cooking, but never one that gave me the air temperature in the cooking chamber of the grill. For this I've tried bi-metal candy/fryer thermometers stuck in the vents, standard off-the-shelf oven thermometers and the venerable Outset F810 (which since writing my previous review got stuck at 300F and has gone to glory) on the surface of the grill; while these are all inexpensive solutions, none of them are really ideal. With any dial type thermometer on the grill surface you have to lift the lid to check your temp, which gives your coals additional oxygen, making it even harder to keep the temp regulated. The thermometer in the vent is good for some things, but the tip never gets near the grill surface (dome temp and grill surface temperature can vary by 30 or more degrees) and can bang into your food when you put the lid on. Additionally, you can't close the lid vent all the way to cool the coals down and still monitor your temperature.

While this Maverick BBQ thermometer is their entry level product for this application, don't let the low price fool you. This thing is packed with features, and all of them are very well thought out and easy to use. The first time I used it, I didn't even look at the instructions. I'm not saying this to impress you with my dazzling ability to figure things out, but to give you an idea of how intuitive the design really is; anyone can read the instructions and use something the first time, but what will happen if they don't use it for a year and can't find the instructions again?

Included in the package is a probe with a metal clip that holds it to the underside of the cooking grate, the thermometer unit and a stand. The stand stays clipped to the back of the thermometer when you aren't using it to keep it from wandering off; in this position it can also be used to hang the unit on a wall. On the back of the body of the thermometer are a pair of magnets that can be used to stick it to any nearby metallic object. I wouldn't think it would be wise to stick it to the outside of your grill when it was in use, but you could also use this model as an oven thermometer.

The real beauty of the design is that not only does it display the temperature inside your grill, but it allows you to set a target temperature; if you go more than 15 degrees above or below an audible alarm goes off to let you know your grill needs attention; since it goes on average temperature over a 10 second span, the displayed temperature isn't shooting all over the place making it harder to read quickly. When you are close to your target temperature the display will read "optimal" to let you know you're making the right choices. The Start/Stop button on the top of the thermometer can be used to temporarily silence the alarm, I'm a big fan of the placement of this button as you can easily hit it without removing your gloves. If the beeping gets to be too obnoxious while you're shuffling your food around with the lid open you can always switch the alarm off. The display is huge and very easy to read from a distance, which is certainly a plus.

The folks at Maverick didn't stop there; they added a timer so you can keep track of how long you've had the food on, or put it in count down mode so an alarm goes off once time has expired.

The probe is built to withstand temperature spikes up to 700 degrees, but the manual recommends that you not exceed 482 degrees for more than 4 hours as the braided stainless probe wire might deteriorate; placing the probe close to the edge of your cooking grate away from direct heat should keep it well below that unless you're trying to use your grill as a blast furnace.

This is a great device to help you learn the basics of temperature control as well; I sat next to the grill and maintained 350 degrees for around a half hour in an empty grill with very little effort. In fact, I was seated most of the time enjoying a beer, not hopping up to check the dial. I can't wait to try it out on a much longer smoke in the very near future.

This thermometer can be purchased semi-locally at Fred's Music and BBQ Supply in Shillington PA (just outside Reading) as well as on Amazon for a few dollars more.

Go grab one- pick up a couple racks of ribs while you're out to save yourself a trip later!

Thursday, August 13, 2009

Tools of the Trade: 5 low-cost accessories for your Weber One Touch kettle

Since many of you already have a Weber, I wanted to put up some info on some "cheap upgrades" for your grill, just in case you didn't already have them. A few of them have different versions, and I'll show the variations so you know which one will work best for what you want to do. These products are all made by Weber, so a perfect fit is guaranteed.

  1. Grill Cover- This bad boy can really keep the grill looking fresh for years, but keep in mind that these come in both standard and premium versions. The gray standard version is low cost (under $10 most places) and is great for keeping dust off the grill if you have it stored under an overhang or in a shed, but isn't really well suited to protecting the grill from the elements for long, especially in the winter. I call this the "one year cover" as that's about as long as they seem to last without tearing. The premium black version costs about twice as much, but lasts years longer. Keep in mind that although it seems like common sense, no cover is going to last very long if you put it back on a hot grill.
  2. Tool Holder- Unless you have a table right next to the grill, you're going to want a place to put your utensils when you aren't using them. Most propane grills have some utensil hooks built in (and often one or more work tables), but no such luck on their round charcoal counterparts. The good news for you is that this gem of an accessory costs less than $5, and clips right onto the rim of the grill. They make a polished stainless version as well for about twice as much; while it looks a little classier, it has one less hook. Both work on the 18.5" and 22.5" models. For the money, this might be one of the biggest time saving additions you could get.
  3. Charcoal Rails or Baskets- When setting up the grill for indirect cooking, these little guys keep the coals where you put them; the center section stays at a moderate temperature to keep your food from burning to a crisp before it has a chance to cook through. You could do without them, but for between $9 for the rails and $18 for the baskets, why would you? The baskets are designed to work only with the 22.5" models, but I prefer the rails as they can be clipped more towards the center to give you larger hot zones if you need them. These work perfectly with a hinged grate, as they can be positioned directly below the hinge for drop in convenience.
  4. Side Work Table- This one is a really great idea. I move my grill a lot, so I haven't purchased one yet, but when it stops getting tossed in the back of the car all the time this will be one of the first things I buy. The earlier versions were made of wood and clipped to the rim and one of the legs, but the new ones are made of high temp plastic. The newer version seems like it would be a little more stable since it has legs that touch the ground, and it also includes three tool hooks. If you are planning on getting one of these they do make a cover that accommodates the table so you don't have to remove it every time.
  5. Rapidfire Chimney Starter- I know we sound like a broken record at this point, but if you only take home one accessory with your new grill, this should be it. Works with all types of charcoal, and lights it quick and easy with no lighter fluid. They last for years if you don't leave them outside. Can be had for under $15 if you get one at Home Depot or Lowes when you're picking up your lumber and sheet rock screws. Grab the newspaper off your neighbor's front porch and light up your coals, you'll be cooking before you know it.

One of the big advantages to the Weber One Touch grill series is the ability to control the temperature with the top and bottom vents; the unfortunate part is that the grill doesn't come with any type of thermometer to monitor your progress. Many people go through years of owning a kettle thinking that closing the vent in the top will hold the heat in and increase the temperature when the opposite is actually true. More airflow from the vents means more oxygen for the burning coals, and the temp can go up rather quickly when airflow is increased. Soon we will be writing several articles on temperature control, and even a few product reviews to give you an idea of what's out there.

Monday, August 10, 2009

Grilled Vegetables

After sampling some grilled zucchini at The Taproom, I've been meaning to recreate them on my own. Back home, my mom would throw any vegetable you could think of on the grill and I definitely owe my love of grilled veggies to her. Seared flesh, whether vegetable or animal, is never unwelcome on my grates.

During the work week, I won't get home til about 7 o'clock which doesn't leave a lot of time for finding fresh produce or hitting any of the plethora of farmer's markets in the city. Last week, I was searching for produce stands around the chadds ford area, which is where I work, and came upon a listing of farm stands in the Brandywine Valley. SIW Vegetables is located on south creek rd. just off of route 1, south of 202. During lunch last week, I took a drive to check it out and it was everything I hoped for. Multiple wagon carts held all kinds of just picked veggies and fruits. Knowing me, you can guess I zeroed right in on the tomato cart. Heirlooms, Uglies, Grapes, Jersey's, I was in heaven. Corn on the cob, squash and zucchini soon found their way into my bags as well. I'm ashamed to admit, I've been slacking on the corn on the cob this year and fully intend to make up for it. A ten spot later and I was on my way. This farm will definitely be a weekly trip for me and I'm considering joining their CSA next year.

So onto tonight's grill.

Corn on the cob.
Growing up in southeastern Pennsylvania meant that every summer, you could count on eating corn on the cob multiple times a week. At least in my house anyway. To this day, my parents still have the same propane burner setup and huge aluminum pan that spent as much time poolside as we did. Always full of water, always filled to the brim with dozens of ears of corn.

Now there are a few different ways to cook corn on the cob and everyone has their favorite. My go to method is simple. I will pull the corn husks down but not off and get rid of all the corn silk. Pull the husks back up and recreate the cocoon around the corn. The husk will act as an insulator and keep the corn from scorching.


Once I've got my coals ready, I'll arrange them centrally in grill so I can use the edges of the grate for the corn. Putting the ears directly over the coals will have the heat burning thru the husks in no time so set up your grill however you prefer for indirect heat.


Those are gonna sit and roast for about 20-30 minutes like that. Meanwhile, I sliced up some zucchini and yellow summer squash and hit them with some olive oil from the Misto. The misto is a pump action oil sprayer that Scott found and we both use it religiously. After a quick spray of olive oil, I dusted the veggies with some garlic pepper and set them aside.


Checking on the corn, I'll see if it's starting to shrivel at all and make sure to rotate the ears for even cooking. Hell, take a small bite and see how far along it is. You'll notice the outer layer of husks with start to dry up and brown but the inner layers are still protecting the corn from damage since they're loaded with water. Here I pulled them off and hit them with a blend of butter and olive oil from Olivio that's readily available in any dairy section. Quick season with salt and pepper, pull the husks back up and thrown back on the grill.


Some people will use grill baskets to grill vegetables or smaller items that can fall through the grates but I usually cut whatever I'm grilling longways so I can avoid that. You may lose a few men along the way but it's a price I'm willing to pay for grill marks.


Obviously your cook times will vary depending on how thick you cut the veggies but they don't usually take very long. I had these on for about 10 minutes with a flip in the middle.


End Scene


what are you gonna grill next?